Tuesday 25 December 2012

Hot Chocolate and Marshmallows!

In this lab, we made marshmallows and hot chocolate!
My group decided that making square marshmallows were too boring so we decided to cup them out of shapes!  


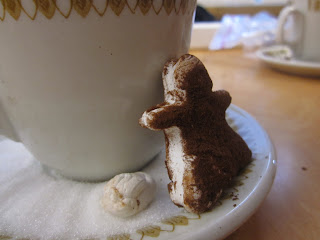
The first shape we used was angels! It turned out really cute because this was during winter, so we pretended they were snow angels, until we put cocoa powder on it...
 
The hot chocolate was really good but we had too much even when we only used 3/4 of what the recipe needed since one of our group mates were gone.


The other shape we used was flowers! The cookie cutter for the flowers (we did about 4 different flowers) was actually from my house that I brought over just for this lab since we didn't want to do square marshmallow and we didn't know if we got to have cookie cutters.


With this cup we decided to put sugar on the rim and sugar on the plate to make a snow theme! We tried to make a "snowball" but we kind of failed at that...


Wednesday 12 December 2012

Banana Splitsville

So to continue with our candy making unit in Food Art we made Banana Splitsville which the recipe was from Good Eats: Citizen Cane. The recipe was split into 3 parts, the basic caramel software (which was the doodads, a random candy swirly thingy), the caramel sauce and the banana brulee. The recipe for me was personally confusing when I read it but when I watched the Good Eats video (Good Eats: Citizen Cane) it made more sense.


Finished Product


The recipe:

Ingredients:  


Basic Carmel Software:
  • 500 mL sugar
  • 250 mL water
  • 1 tablespoon light corn syrup
Caramel Sauce Software:
  • 1 batch caramel (above)
  • 500 mL heavy cream
Banana Brulee Software:
  • 4 bananas
  • sugar for coating

Additional: ICE CREAM


Method:
  1. Combine the sugar, water, and corn syrup in a small, heavy saucepan and place over high heat.As soon as the sugar dissolved, heat your thermometer under warm tap water (to prevent thermal shock) and attach to the side of your pot,  making sure that the bulb is completely submerged but doesn't touch the bottom of the pot. DO NOT STIR THE MIXTURE OR AGITATE THE PAN AT THIS STAGE!
  2. When the mixture reached 230°F (110°C), reduce the heat to medium and allow the sugar to colour gradually. As the temperature approached 300°F (150°C) the colour will start to turn amber. At this point, it's safe to swirl the pan gently to help distribute the heat evenly. As the caramel heads towards 340°F (170°C), it will reach a deep amber colour.
  3. Remove the pan from the heat and slowly stir with a metal spoon, allowing it to cool until the caramel falls from the spoon in a solid stream, like a string (keep stirring and lifting up the spoon). When it does, it's doodad time!
  4. Form the doodads by holding the spoon 12 to 16 inches over with caramel and drizzling a pattern on the parchment. The thinner it fall from the spoon the better (Hint: allow the spoon to unload into the pan for a few seconds before attempting the doodads. This will allow a narrower stream).
  5. Quick back and forth motions or side to side movements are the best (I personally like to make circles). It's all in the wrist. Allow the doodads to cool for 15 minutes then peel the paper off (not the other way around, you might break it). Stack in an airtight container with wax paper between in each pieces if you are not using it.
  6. After making 15 to 20 doodads, you should have sufficient caramel reaming to move on to the sauce phase.
  7. Return the remaining caramel to medium high heat and continue cooking until you dee the first sign of smoke (in the pot not the element!) Immediately remove from the heat, and add the cream all at once, at arms length (it will boil furiously). Once the mixture calms down, return to medium heat and boil for 3 minutes more, stirring occasionally. Cool to room temperature and then move to squirt bottle (or just into a glass bowl and cover with plastic wrap) and refrigerate for up to a week.
  8. To make the banana brulee, quarter the bananas (peel on) and then remove the peel and put sugar (we put a lot) on the flat part of the banana and place on cooling racks over several players of foil. (Don't try to do this on you dining room table). Don you safety goggles and fire up your torch (you don't actually need goggles). Hold the torch so that the very tip of the flame barely touches the banana, and move quickly back and forth until the sugar melts, turns brown, and bubbles. As soon as it looks like caramel (the top of a crème brulee), move on. You know you've got it down when a solid, glass like sheet of gold (no graininess)  has formed on the banana.
  9. To do the split (so to speak), squirt a pattern  of caramel sauce on a chilled plate top with 4 banana pieces (Lincoln log style), top with ice cream of your choice and finally, a doodad. But you can do it any style you want if you don't want to do the log one.

Product: 

I keep forgetting to bring my camera to class >.< (had to charge it last night and forgot to put back the battery so I brought a camera with no battery) so yet again I had to use my iPhone camera  which not only was crappy but in the middle of taking pictures it shut down on me when it still had 100% and refused to open again for the whole day until I plugged it in a charger! So I was only able to take few. I asked if someone (ie. one of my group mates that wasn't my sister) if she could take some pictures for me and send it to me but she refused which was pretty mean especially when she took pictures off my blog without asking me! Sorry for that little rant there but it was making me angry.


Sorry for the really bad pictures


heating the sugar


we didn't get an amber colour for our doodads >.<

Caramel sauce when we added the heavy cream (bubbling)


Our first attempts but we got better!


We actually put more sugar on it but it dissolved
but we put more in the end


Bananas we torched
close up, you want an amber colour

the plate that I decorated


my finished product! it was good though the ice
cream was kind of bad, it was all chunky 


tried to use this new app on my phone


Overall the product tasted really good (except the ice cream), my group really liked the caramel sauce, they were putting in everywhere! The doodads were kind of spiky when we ate it...it hurts when it when down our throat. 

Easy Nut Brittle


In our food art class, the unit we're doing right now is candy making!! I love candy but I can't say I like making it...it's all about the temperature and things like that which I suck at. But lucky this recipe was REALLY easy to do!


Finished Product
The recipe:

Ingredients:  


  • 250 mL sugar
  • 125 corn syrup
  • f.g. salt
  • 250 mL nuts ( it can be peanuts, cashews, almonds, macadamia nuts, etc.)
  • 5 mL butter/margarine
  • 5 mL vanilla
  • 5 mL baking soda

Method:
  1. Spray a jelly roll plan with non-stick spray and place on a hot mat.
  2. In a large glass bowl or glass measuring cup stir sugar, corn syrup and salt (if the nuts are salted already, you don't need to put in salt) with a wooden spoon or silicon spatula.
  3. Microwave the mixture on high (cover the top with scale paper or a paper towel) until the syrup is pale yellow (about 5-8 minutes). If it doesn't turn colour when the time is up add 30 seconds until colour change.
  4. Add nuts and then put it back into the microwave for 1 more minute (or longer if you don't get an amber colour to the mixture, always add only 30 seconds every time you put it for longer in the microwave).
  5. Immediately stir in the butter, vanilla and baking soda. Don't worry if it starts bubbling  or foaming, it's meant to do that.
  6. Quickly and carefully (it's HOT!) pour into the jelly roll pan.
  7. Spread the brittle evenly across the jelly roll pan (you have to do this quickly or it would start to harden).
  8. When the brittle is completely cooled break into pieces.


Product: 

So I forgot my camera when we did this lab so I had to use my really bad iPhone camera. So sorry for the bad pictures!


This looks really unappealing in this picture...
but it tastes really good! 


At home, since I didn't have time to take pictures during school.


I really liked this recipe, not only was it easy but delicious too! Everyone in my family liked it except my grandma but she complains about everything I make.

Thursday 29 November 2012

Cupcake Mosaic


Our assignment was to create a mini cupcake mosaic! We worked with mini cupcakes of about 3 cm in width. We worked in pairs, I worked with my twin sister (she will also be posting this on her blog).
We had to design our "own" cupcake design, we were allowed to use a well know art work or make something unique. 

Finished Product

The recipe:

We used the yellow cupcake recipe for our cupcakes, which can be found here.
For our icing, we used the classic buttercream icing, which can be found here


Product:

Since Faith was being really lazy, very indecisive and not really helping at all! I had to  design our cupcake mosaic but she had to agree with it before we used it.

So since right now I am like obsessed with One Direction (linked in case you don't know about One Direction), not like my friends who practically screams about them every second, I'm more like a closet fan and only fangirl in private.

My other plans in case Faith didn't like my One Direction flag was a turtle, a owl or the UK (same as the Britian) flag.

This is design is in reference to One Direction, if you know them, you know that Niall is from Ireland and Zayn, Louis, Liam and Harry are from Britian so the "flag" is half the Ireland flag for Niall and Britian flag for the others. 

A lot of people didn't understand this mosaic when I showed it to them but lucky I had some fellow Directioners who understand. 


Plain before icing


Faith did the triangles...they look kind of weird


Gingerbread


For our food art class, our project for the past few weeks was making a gingerbread structure/building. It was to be part of our school Winter Village that will be displayed at the Hyatt Hotel for a month! Personally I don't really like making gingerbread, I could never tell when my dough is soft and workable!


Finished Product

The recipe:


Ingredients:  


  • 250 mL Shortening
  • 25o mL sugar
  • 2 eggs
  • 300 mL molasses
  • 15 mL vinegar
  • 1370 mL flour
  • 5 mL baking soda
  • 5 mL salt
  • 5 mL ground ginger
  • 5 mL ground cinnamon
  • 5 mL fround cloves

Method:
  1. Cream shortening well.
  2. Gradually add sugar and cream well again.
  3. Beat in eggs, molasses and vinegar.
  4. Stir together 250 mL of the flour along with baking soda, salt and spices.                                        
  5. Gradually blend the first cup of flour and spices into the creamed mixture and mix well.
  6. Add another 250 mL of the flour gradually, blending well.                                     You may find that at this point the dough is stiff enough and the reaming flour may make the dough too dry and crumbly. Your dough should feel soft and workable but not sticky. If you think it had gotten too dry and crumbly then re-crumble into a bowl and sprinkle with a little water and work until it comes together and is workable.
  7. Gather the dough into a ball then flatten it into a dish and wrap it tightly with plastic wrap and put in the fridge if you are baking on a different day.
  8. Roll out the dough to 3mm thickness  (check with a ruler)                                                          *It may be easier to shape large, cut-out pieces of gingerbread directly on the baking sheet or onto parchment paper, so that the dough doesn't distort as you transfer if from the work surface.
  9. Cut into shapes.
  10. Place 2.5 cm apart from each other on parchment lined cookie sheets or jelly roll pans.
  11. Bake at 375°F or 190°C for 5-6 minutes or until firm and lightly browned.                       *Like any cookie, gingerbread is not crisp or firm when it first comes out of the oven: this means it may be difficult to tell whether it is cookies, particularly as cooking times vary from oven to oven. Generally, the dough will have risen slightly and will be just colouring around the edges. Do not under cook.
  12. Cool slightly on the sheet for about 5 minutes, in which time it will start to crisp, and then remove to racks to cool completely.                                                *If the gingerbread still feels very soft, return it to the oven for a few minutes.
  13. Very often the gingerbread will distort slightly during baking. If you wish or feel the need to trim it to reshape (especially for the houses pieces to fit properly), be sure to do it while the dough is still warm. If you allow it to cool and then try to trim it, it could break.
To store:
Large, flat pieces of gingerbread must be cooled and stored on a flat surface or they will become distorted. Use a box or try to store and in a ziplock bag. 

Product:


In the Village

Village

Village